DIY European Skull Mounts

Have you ever shot a buck or a bull that you’re proud of, but just can’t justify the pricey taxidermy bill on a shoulder mount? I’ve been in this situation with multiple deer. Instead of spending $600 on a shoulder mount, ive decided to start doing my own european style mounts. Not only do they save you money, but in my opinion they look really cool. I’ve done a couple in the past but never whitened the skull. In this blog, I’m going to take you through the process of how I did it. I know there are many different ways to do this, but here is how I attempted it for the first time. From start to finish.
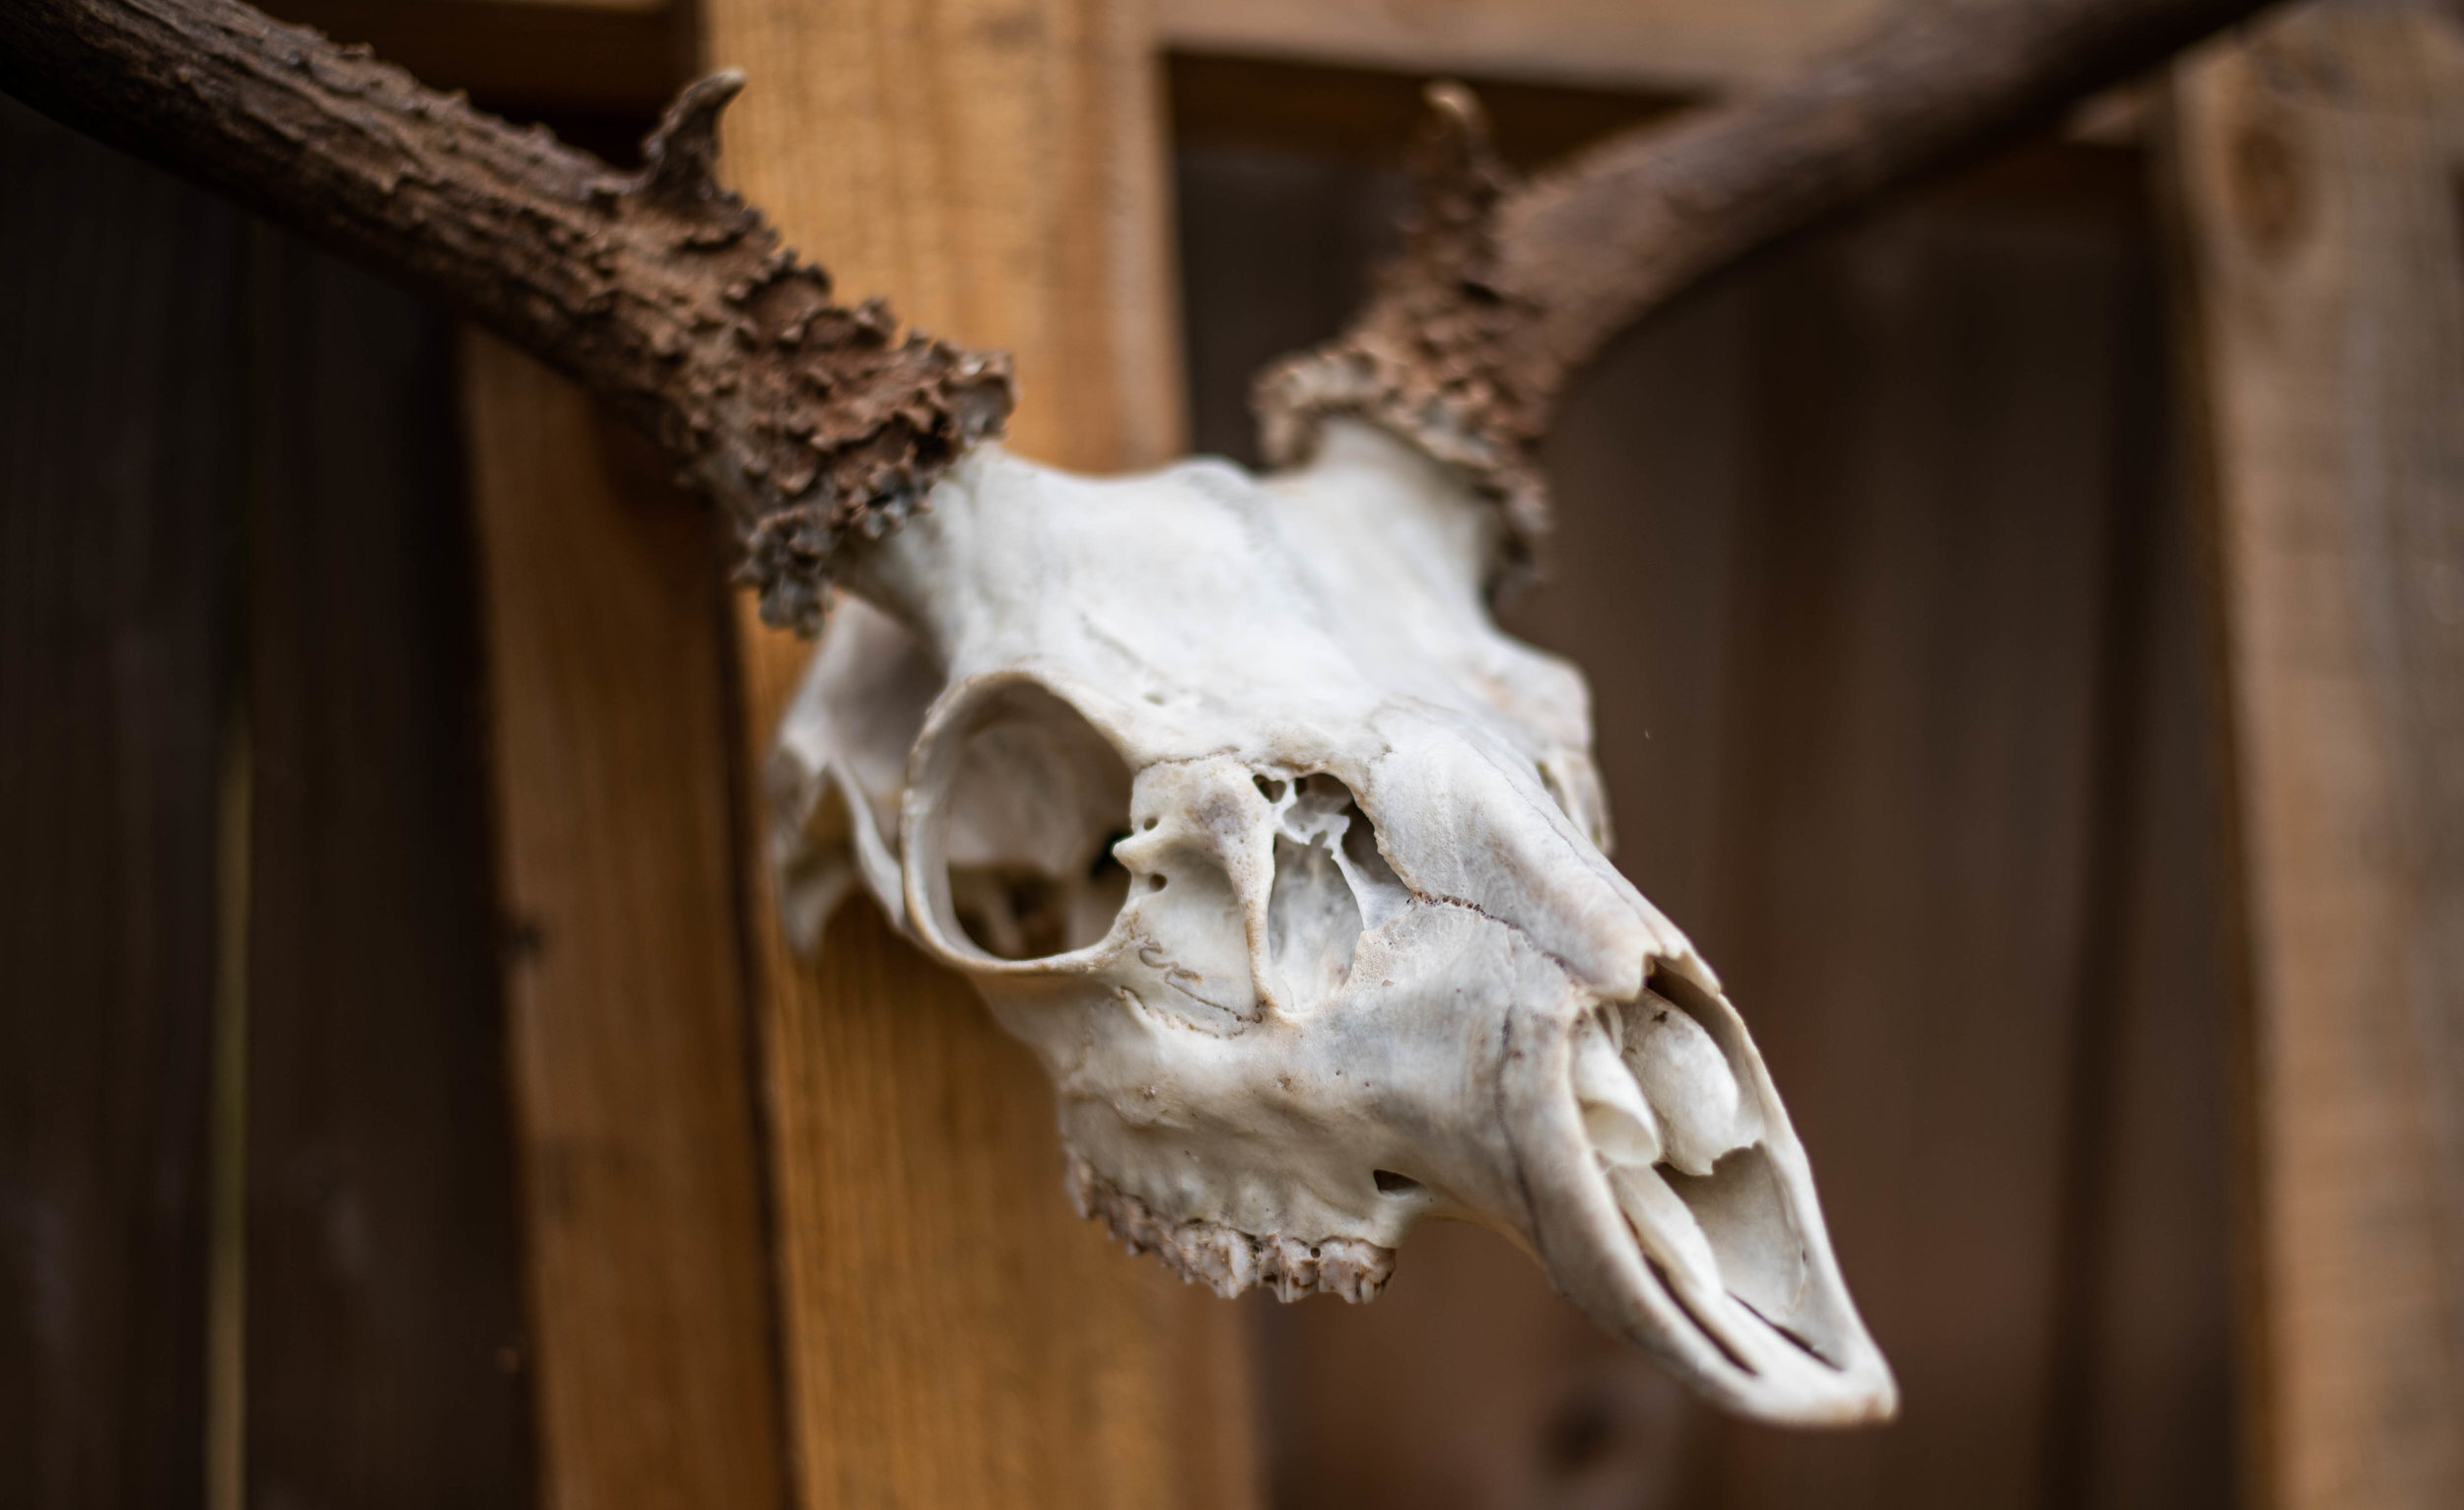
After the harvest and while still in the field, I like to remove all of the hide and skin from the head. This saves some weight in your pack and is fun to do while back at camp, reminiscing about the days hunt. Once home, remove the lower jaw and cut off as much meat as possible. Including the eyeballs, tongue and any hair around the base of the antlers. I made the mistake of trying to remove the jaw right after the simmer process, and broke the nose bone on Jeff’s deer because the bones were so fragile. So remove the jaw before the simmer. Now, Its time to make some head stew. I use a large propane turkey cooker and do this outside. Some folks do this on their stove top but my wife isn’t a fan of smelling deer brains inside the home. And neither am i. Place your skull inside the pot and fill to the base of the antlers with water. Take a piece of wood to prop up the antlers and keep the skull fully submerged. Add a small squirt of dish soap to the water. This acts as a degreaser and helps with the removal of flesh. It also helps with the bleaching process by getting rid of oils on the skull. Bring the water up to a boil and then down to a slow simmer. You want to make sure to simmer and not boil, because the bones can break down and fall apart if boiled for too long. Simmer the skull for two hours, give or take. Or until the flesh can easily be removed and cleaned off. Once your head stew is cooked and tender, set the skull aside and let it cool down because it will be very hot.


Now it’s time for the dirty work. You will need a variety of tools and instruments to clean all of the meat and brains out of your skull. Even though it’s gross, I personally enjoy this part. I’ll start by using a knife to remove the biggest chunks of meat that are easily accessible. For all of the tight spots I use needle nose pliers and dental tools. You can find dental tools at any Walmart or most major grocery stores. This is tedious work and takes a good amount of time to get the skull picked clean. The best way I’ve found to remove the brains is to use a pressure washer. Chest waders, safety glasses and an old tee shirt are a must. Because you will get brain matter all over the place. Make sure to do this part out in the yard and away from anything that you want to keep clean. Fire up your pressure washer, stick the tip of the nozzle in the brain stem on the backside of the skull and pull the trigger. Try not to puke. Repeat this process until everything is cleaned out. If you don’t clean it out completely, it’ll stink to high heaven and you don’t want that in your house. I will also pressure wash other areas of the skull where I couldn’t quite get it clean with tools, like the eye sockets and the brain stem area. The bones inside of the nose cavity are very fragile and I do not pressure wash this area, because they will break and fall apart. For the hair around the base of the antlers I use a small flat head screwdriver and pliers to get it clean. A lighter works great for burning off any remaining hair.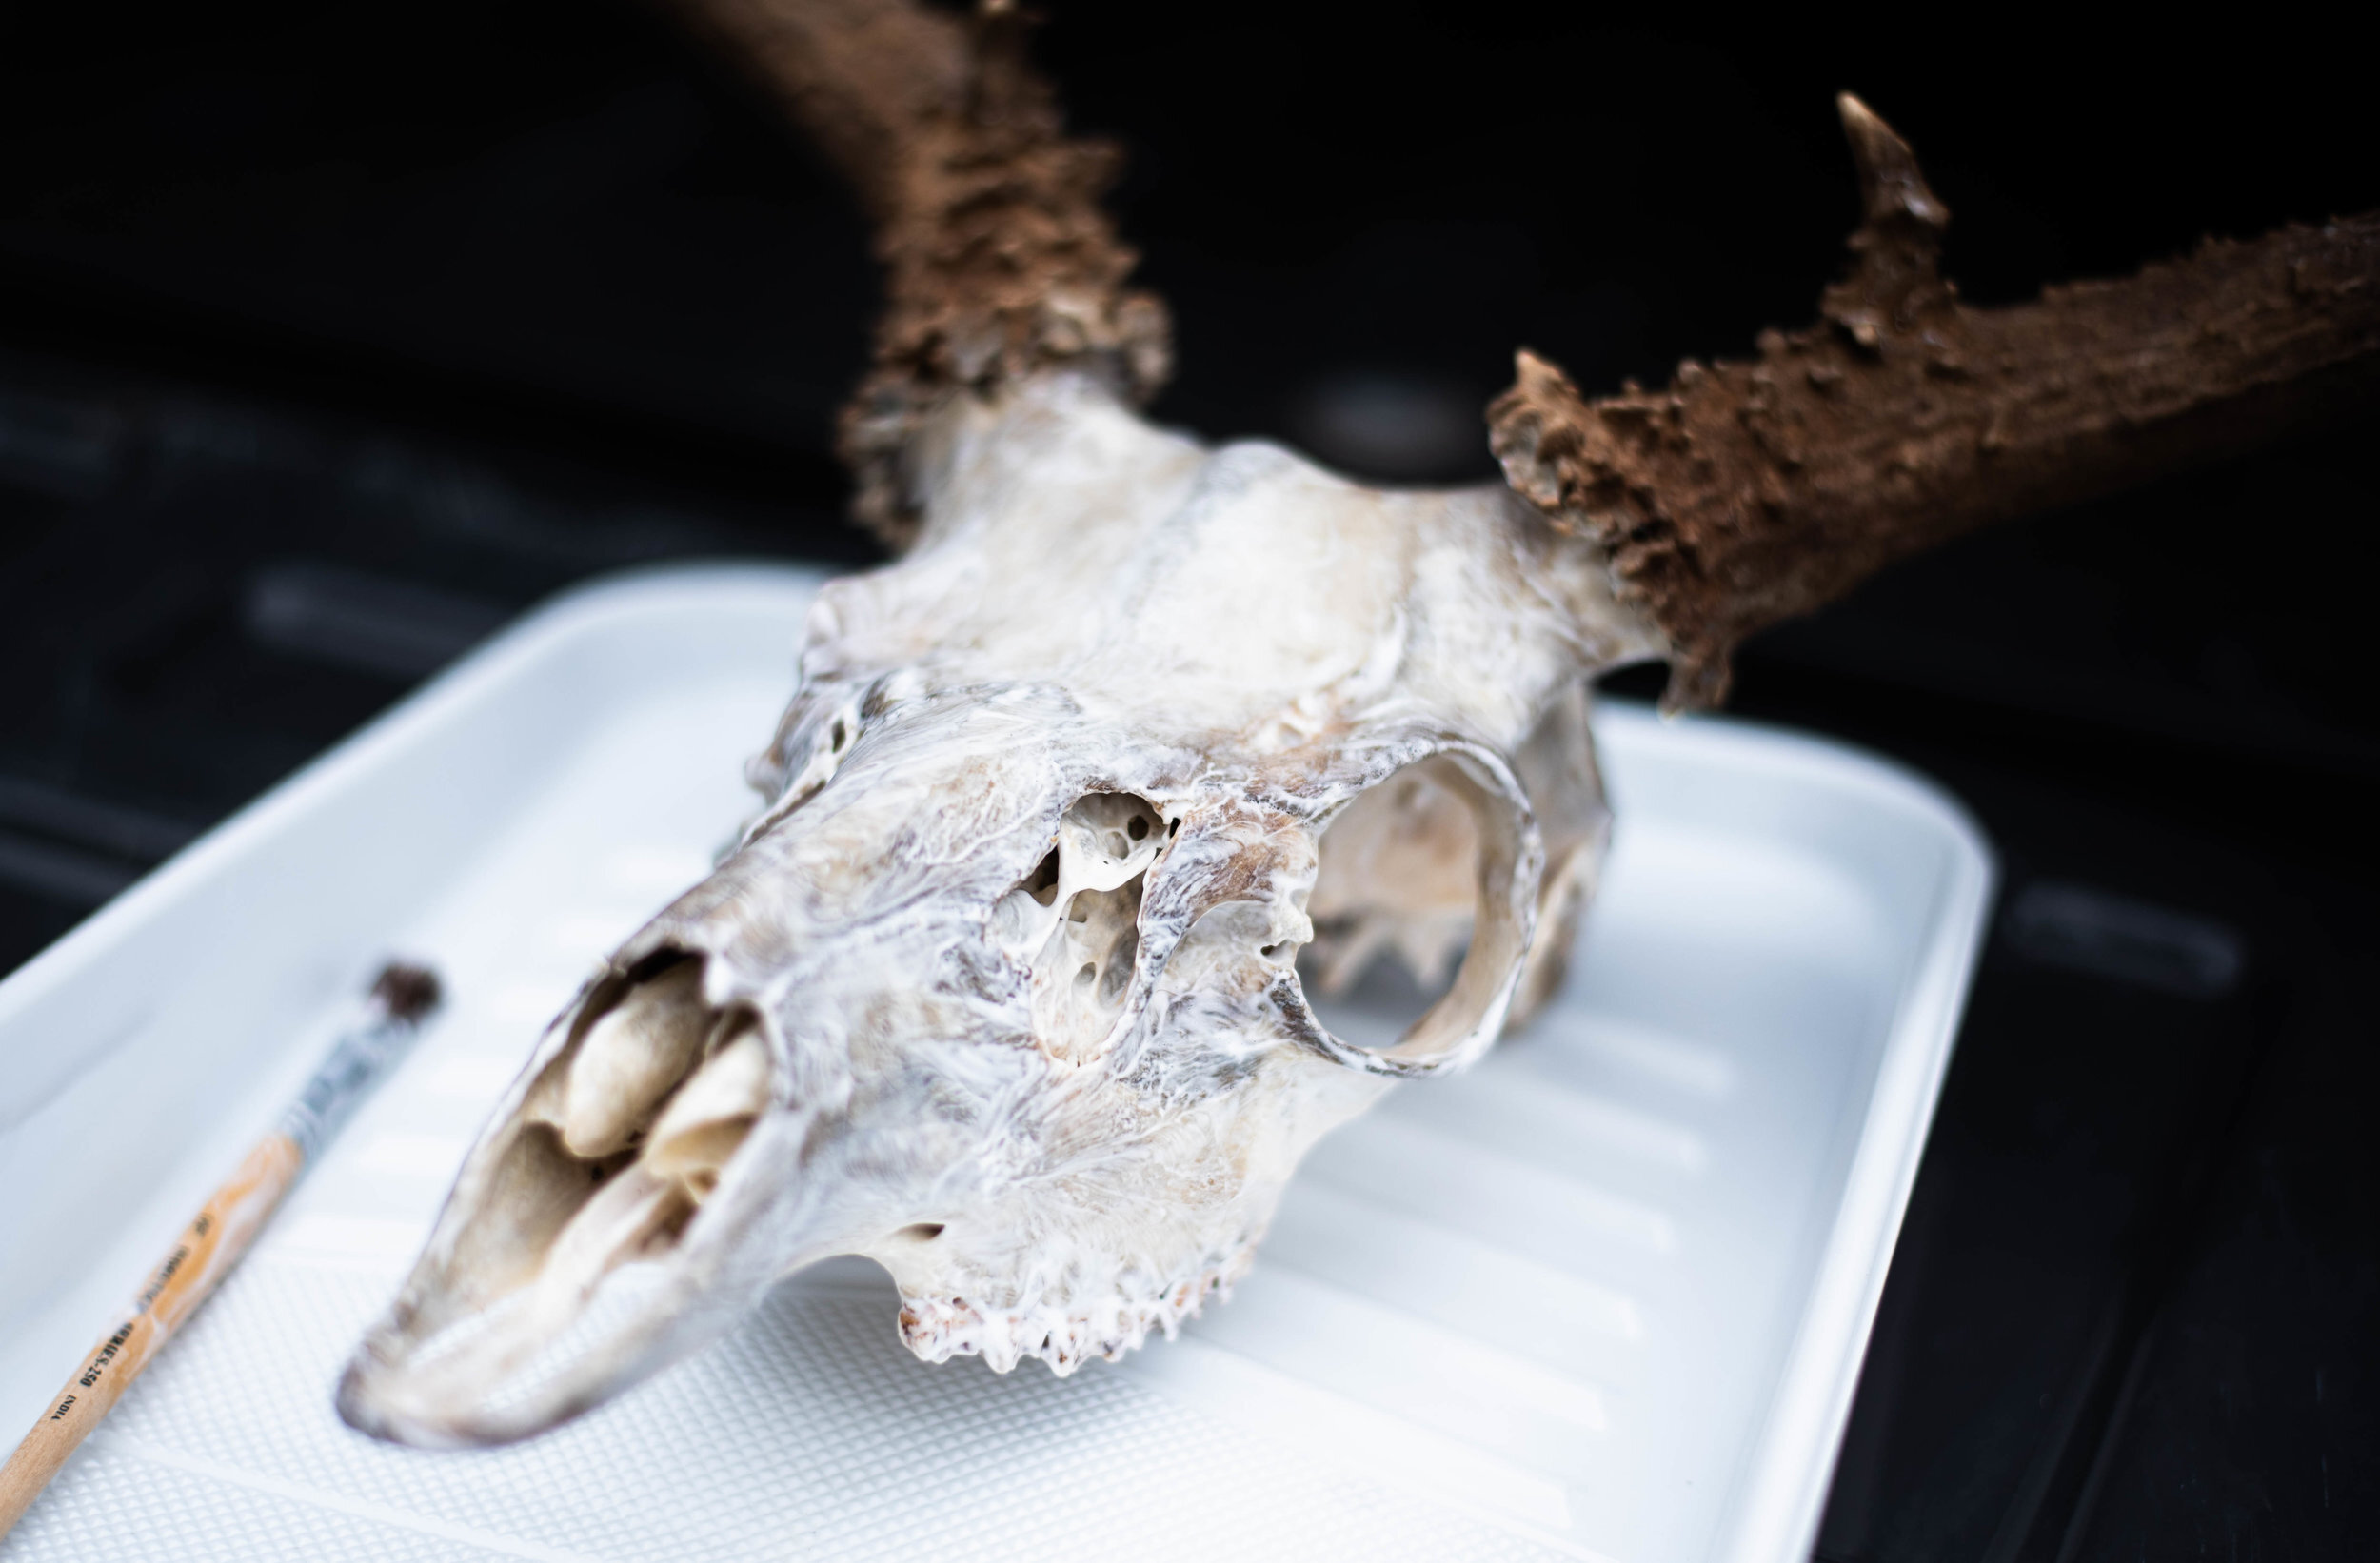
Now that your skull is all cleaned up, let’s get to the whitening process. I used salon care 40 volume creme developer and it worked great. I know there are a few different ways to whiten a skull but this was simple and effective. Place your skull in a paint tray or a plastic container that will contain the bleach. Whatever the creme touches, it will turn white. So do your best to keep it off of your clothes and especially the antlers. You can wrap and tape the antlers to make sure that no bleach gets on them if you’d like. Drizzle some creme over the top of your skull and work it into every little crack and crevice. Do this on all sides of the skull. I used a small paint brush and found it was easier than using a big one, because there a lot of tight areas to get into. Once there is a thick layer applied, you can walk away and let it rest for a day or two. If you find that it’s not quite white enough for your liking, you can apply a second coat of creme. One coat was enough for me.

Now that your skull is all cleaned up, bleached and dry, it’s time to show your family and friends. Get yourself a skull hooker and put it up on the wall. For under $10, you just created something that will last forever and look great for generations to come. I think we’ve all seen old shoulder mounts that look more like a faded, dried out carcass than an actual deer. Take your harvest, make a euro and you’ll never have this problem. If you happen to have any questions, go ahead and shoot us a message or email. Good luck on doing your own european style mount!